
Neon Light Manufacturing Process: Step by Step Guide


The history of neon lighting goes way back to the 17th century. It began with a French astronomer noticing sparks of light when a glass filled with mercury was shaken. It is this idea that was further developed, for many years, until neon lighting came into being.
While neon lights are today quite popular, they can be a bit of a mystery if you are not a lighting expert. How exactly do they work? More importantly, what makes them different from normal incandescent or LED neon lights?
Here are some answers to these pertinent questions as well as a step by step guide on how to make neon lights.
A neon light consists of a sealed glass tube that has electrodes and is filled with a noble gas. The most common noble gas that is used is neon hence the name, ‘neon lights’. The general working principle of these three components is that when the molecules of a noble gas are activated they emit light. The illumination process occurs as follows:
Electric current flows from the power supply to the electrodes in the glass tube
The molecules of the gas in the tube get activated or begin to vibrate as electric current flows
Neon light is emitted from the ‘sparks’ of these molecules vibrating against each other
Glass is a fragile material. However, it is also the only one that is transparent and can handle heat relatively well. That said, not all glass is made equal, some types are more resilient than others. As such, neon lights are made using soft lead glass tubes measuring between 4-8ft. In some cases, borosilicate glass can be used because it tolerates heat quite well. The glass processing proceeds as follows:
Cleaning- the glass tubes are cleaned to ensure neon light clarity and then briefly placed in a kiln to dry.
Phosphor coating – if you ever wonder what makes neon lights glow so much, that would be the phosphor coating. It is applied to the dry cleaned glass tubes and they are once more placed in a kiln in a vertical position for the coating to dry. Some neon light manufacturers may also tint the glass tubing with color at this point.
Not all neon lighting glass tubes are coated in phosphor or color. It is a technique mostly used to bring about a glowing effect or produce interesting colors of neon light. This is made possible by the fact that phosphor coatings are available in different colors.
An electrode is a conductor that is used to create a circuit through the noble gas in a neon glass tube. It is made of iron which is a good conductor of electricity. The core of the electrode is encased in glass but each electrode has 2 conductor wires that extend outside the glass casing.
Electrodes are placed at each end of neon light glass tubing. The tip of the electrode facing outside the glass tube is connected to the power supply source. Consequently, when the power source is turned on, current flows through the electrode and into the molecules of the noble gas inside the neon glass tube. To prevent leaks, electrodes are placed before the glass tube is filled with gas.
For the glass tube to be filled with pure noble gas, the air inside it has to first be evacuated. Otherwise, it would ‘dilute’ the noble gas and yield poor neon lighting. The process used to evacuate the air from the glass tubing is referred to as ‘bombarding’. It occurs as follows:
The air in the glass tube is evacuated until the inside of the glass is a vacuum.
Dry air is introduced into the glass to build pressure.
Depending on the length of the tubing, an electric current of about 400-750 milliamperes is run through the electrodes and Into the glass. It heats the tubing to over 400°F.
Note: this further rids the glass tubing of impurities that could compromise the gas.
The electrode in the glass tube is equally heated to over 700°c.
The tube is once again evacuated into a vacuum below 10 torrs.
Noble gases have the same overall characteristics but they are not identical. For this reason, each of them is filled with a unique pressure. The amount of pressure used also depends on the diameter of the glass tube; the larger the diameter, the more the pressure required.
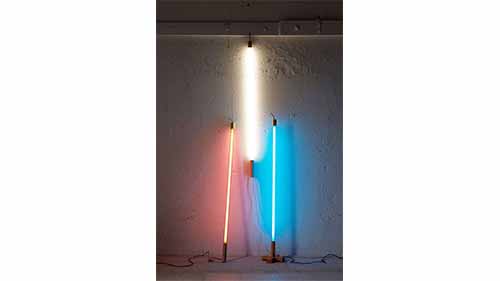
Different noble gases are used to produce different colors of neon lighting. Neon, which is the most common and inexpensive, produces red-orange hues. Helium is great for pink to red hues while xenon and krypton glow in lavender and yellow-green colors respectively. Finally, argon is used to make blue neon signs. However, its lighting is very faint and it is therefore tinged with some mercury to enhance the glow of its light.
When the gas is filled into the glass tube, and the level of pressure is right, the tube is sealed by heating the tubular port until it shuts. Over 100 colors of neon lights can be realized by combining different noble gases and different glass tube coatings.
All the processes a glass tube undergoes can cause the glass to become ‘stressed’. This refers to a state where the glass tube is tense and taught which could make it break when the light is turned on. To prevent this, the gas-filled neon light glass tube is slowly heated and then allowed to cool on its own. This process is known as annealing.
Annealing is equally vital in ensuring that the gas properly settles into the glass tubing. As the tube is heated, it expands and the gas has a chance to spread evenly. As a result, the lighting in the glass tube will likely be consistent throughout the entire length of the tubing.
With all components in place and the glass tubing ‘de-stressed’ and cooled, the neon light would be ready for testing. The power source is turned on to deliver electric current and soon the neon light should come alight. Noble gases have different densities and due to this, a Neon gas light may come on thicker than one with Argon. This is because the molecules of a denser gas are more and closer to each other. They, therefore, vibrate at a higher rate and produce light sooner.
If the neon light does not light up, has an unlit spot, or flickers, it is likely an indication that:
The bombardment process was not effective and there are still impurities in the glass tubing hence the flickers.
The inert gas was not filled adequately hence the unlit or dimmer spots in the glass tubing.
In either case, the processes may have to be redone.
Now that you know the neon light making equipment needed as well as the procedure, you might be considering trying to make your own. More so because this type of lighting can be quite pricey. Word to the wise, do not try this at home. While it may sound simple, the temperature and pressure conditions required are not safe to attempt in an uncontrolled environment. The equipment is also expensive and specialized thus any attempts to improvise may end in tragedy.
Pros
It emits unique colored lighting that glows which is near impossible to achieve with other forms of lighting
It is great for signage as it commands attention
Cons
Neon lighting is expensive to make and buy
Over time, neon signs tend to become noisy
Gas leaks, especially in neon lights with mercury, can be health hazards and would also compromise the lighting
The glass tubing used for neon light is breakable which may limit the lifespan of a neon light
If you are looking for neon lighting that is less fragile, more durable, and less complicated, consider LED neon flex lights. They are made by joining Light-Emitting Diodes( LEDs) to form a strip of lighting. They are then jacketed in a flexible silicone cover to shield them from water, impact, and other forms of damage.
LED neon flex lights emit neon light that looks just as good as an ordinary neon light. It would even be accurate to say that they work better because they rely on LEDs for illumination as opposed to unpredictable noble gas molecules. This also means that their lighting is more consistent and brighter.
In terms of color, you would still be able to enjoy multicolored lighting with LED neon flex lights. For this, however, you will need RGB or RGBW LED neon flex lights as they have colored diodes to produce different color combinations. What’s more, you can install this type of neon lighting all on your own and adjust the brightness as you see fit.
Pros
They are easier and more affordable to produce and are, therefore, cheaper than neon lights
They are flexible and can be installed anywhere with ease
Eco-friendly; their production and operation has a low carbon footprint
LED neon flex lights offer a wider array of colors than neon lights
Cons
LED neon flex lights lack the classic appeal of neon lighting
Poor installation or power supply results in malfunctions or spotty lighting
The classic glow and buzz of a neon light are reminiscent of a homey diner or an inviting jazz club among other familiar places that have stood the test of time. Perhaps this is why, despite the rigors of production, neon lighting is still popular. That said, it will be interesting to see how it stands up to newer neon lighting inventions from LED neon flex light manufacturers.


